Sunday, December 2, 2012

Chili Relleno

Our landlord brought over some chili peppers the other day that had grown in her garden are were too much for her to consume prior to their decomposing.  We graciously accepted and then TJ requested I make Chili Relleno's.  Since I am in no way of Spanish/Mexican descent, I proceeded to make what I thought to be Chili Relleno's, but apparently were simply peppers stuffed with shredded chicken and topped with cheese.  TJ was pretty frustrated at that point and was devastated that he didn't get his authentic Chili Relleno's; he does ask for very little :) 

In an attempt to please my very dissatisfied husband, I found an "authentic" recipe on Pinterest and was told by TJ that while they were unlike any Chili Relleno he has ever had (I think they are authentic, but from a different region of Mexico than he is used to), but were so delicious and he liked them better than any other chili Relleno he has ever had. 

So...while this recipe is back breakingly involved...the result is an explosion on the taste buds.  It is creamy, spicy, gooey, and all around delicious.  Well worth all the work!!!  I also used all the left-over sauce to make enchilada's the next night.  The sauce is out of this world!!!


broth:
1 garlic clove
1 white onion, chopped
1 (8 ounce) can tomato sauce
3 fresh tomatoes
1 teaspoon cumin
2 tablespoons chicken bouillon
3 cups water
1/2 onion, cut into wedges

chili:
8 poblano peppers, peeled, seeded and slit
1 lbmozzarella cheese
1 cup queso fresco, for garnish (optional)
vegetable oil (for frying)
toothpick

batter:
6 large eggs, separated (cold)
1/2 teaspoon salt
2 cups flour (for dredging)

Blend garlic, tomatoes, cumin, chopped onion, chicken bouillon, tomato sauce, and water until it’s all into liquid form. Make sure there are no chunks of anything. Set aside.

Chili:

You need to get the skin off the chili.  The best way to do this is to blister them on griddle, or in the oven. You can also deep the fry in hot oil for about 1 min remove, let cool and peel.  When both sides are fairly evenly blistered/charred, remove them and place in a sealed plastic bag to steam and peel after about ten minutes.

 
Stuff chilies with cheese and hold together with toothpicks. One tooth pick per chili is fine. Set aside.

Batter:

With a high speed mixer beat egg whites to stiff foamy peaks are formed and in a separate bowl combine the egg yolks with one tablespoon flour and salt and mix well. Then bled the yolks into egg whites and beat until you have a thick paste and it’s well incorporated.

Dust chiles in the flour and dip quickly into batter and when completely covered lay in hot oil. Baste tops with hot oil and fry on each side until golden brown.

Place the chiles in a deep wide sauce pan/pot. Once all chiles have been fried and arranged in the pot add the onion wedges and sprinkle extra cheese on top Mozzarella or queso fresco.
Finally pour the sauce over the chiles and cover till it boils. When the chiles and sauce start to boil reduce the heat and simmer for an extra 10-15 minutes.

Red Coconut Curry

This is such a simple meal and tastes just as good, if not better than any Thai food restaurant I have ever eaten at.  The original recipe called for rice noodles, but after TJ and I ate it, we both decided that rice would be better.  It definitely needed something to soak up all the flavorful juices! 


1 Bell Pepper, cut into thin strips

A handful of baby carrots, cut into thin strips

1 jar Thai Kitchen Red Curry Paste

1 can lite coconut milk

1 can bamboo shoots

1 cup chicken broth

Rice – I like short grain sticky rice, but use whatever you have on hand

Cilantro

Soy sauce, to taste


Get your rice a cookin right off the bat…this is what will take the longest to cook.  For this recipe you will need about 2 cups of uncooked rice.  I do it in my rice cooker with 2 cups rice and 4 cups water.  Comes out perfect every time!

Drizzle a bit of olive oil into your pan and empty about half the jar of the curry paste into the pan. Mix up and let those two really get to know each other.

Add one cup water plus one cup chicken broth into the skillet. Add the carrots and bring to a boil. Cover and let it rumble…but only for like a minute. Nobody likes mushy carrots.

Add the can of coconut milk and the peppers, at this point taste your concoction…you may need a bit more curry paste if you want it more flavorful/spicy.

Add about 1/4 cup of soy sauce into the mix. In a bowl, put a decent helping of rice. Then ladle on some of that delicious sauce and veggies right over the rice. Top with cilantro. Add more soy sauce if you think it needs a bit more saltiness.  Enjoy!

German Pancakes and Buttermilk Syrup


This recipe is TJ's family secret recipe.  They are delicious, fluffy, and have a great crispy/chewy texture.  This recipe is also very simple.  You don't have to slave over a hot stove flipping pancakes, and while the German Pancakes are cooking you have plenty of time to make the simply diving syrup.  We were recently in Vermont where we purchased 100% pure maple syrup.  TJ told me that the buttermilk syrup was better!!!  If you know TJ then you know that when he compliments something, he really means it!!! 
Pancakes:
6 eggs
1 cup milk – I used whole milk
1 cup all-purpose flour
1/2 teaspoon salt
2 tablespoons butter, melted
1 teaspoon vanilla
Buttermilk Syrup:
1-1/2 cups sugar
3/4 cup buttermilk
1/2 cup butter
2 tablespoons corn syrup
1 teaspoon baking soda
2 teaspoons vanilla extract
Confectioners' sugar
In a blender, combine the eggs, milk, flour and salt; cover and process until smooth.

Place butter into a glass 9 x 13 pan and place in a cold oven.  Set oven temp to 400°.  When oven is preheated and the butter is melted in the bottom of the pan, pour the batter into the pan and bake, uncovered, for 20 minutes. 

Meanwhile, in a small saucepan, combine the first five syrup ingredients; bring to a boil. Boil for 7 minutes. Remove from the heat; stir in vanilla. Dust pancake with confectioners' sugar; serve immediately with the syrup. 8 servings (about 2 cups syrup).

Wednesday, October 24, 2012

Crock Pot Chicken and Dumplings

This again is one of those super easy Sunday meals that you can throw in the crock pot before church and then do almost nothing more until dinner is ready.  Its wonderful to be able to enjoy the family and then enjoy the dinner and no one has to slave away in the kitchen (and by "no one" I really mean us moms...can I get an amen).  This is also a wonderful comfort food meal!  Would be a great meal to take into a family!


2 medium carrots, thinly sliced
1 stalk celery, thinly sliced
1/3 cup fresh or frozen corn kernels
1/2 of a medium onion, thinly sliced
2 cloves garlic, minced
1 teaspoon snipped fresh rosemary or 1/2 teaspoon dried rosemary, crushed
1/4 teaspoon ground black pepper
chicken thighs, skinned
1 cup reduced-sodium chicken broth
1/2 cup fat-free milk
1 packet Bisquick biscuit mix (I used Cheddar cheese)
Coarsely ground black pepper (optional)
 
 
In a slow cooker, combine carrots, celery, corn, onion, garlic, rosemary, and 1/4 teaspoon pepper. Top with chicken. Pour broth over mixture in cooker.

Cover and cook on low-heat setting for 7 to 8 hours on low or on high-heat setting for 3 1/2 to 4 hours.

If using low-heat setting, turn to high-heat setting (or if no heat setting is available, continue cooking). Transfer chicken to a cutting board; cool slightly. When cool enough to handle, cut chicken off bones; discard bones. Chop chicken; return to mixture in cooker. In a small bowl, mix the biscuit mix together according to package directions.

Using two spoons, drop Dumplings dough into four mounds on top of hot chicken mixture. Cover and cook for 20 to 25 minutes more or until a toothpick inserted into a dumpling comes out clean. (Do not lift cover during cooking.) If desired, sprinkle each serving with coarse pepper.

Shrimp Spring Rolls with Peanut Sauce

These spring rolls are easy, delicious, and oh so delicious...(did I say they were delicious).  While most of the ingredients are a bit obscure and costly at first...they last forever.  Just think about all the amazing spring rolls you can make!!!  It's giving me chills!  They are also so stinking fresh and healthy.  Well they have veggies and peanuts, so that constitutes a health food right ;)

16 shrimp (31-40 count)
1 tablespoon olive oil
4 rice paper sheets
2 cups shredded lettuce
1/4 c chopped cilantro
1/4 c shredded carrots
salt and pepper to taste

Heat olive oil in skillet and add shrimp.  Season with salt and pepper until the shrimp is cooked all the way through.  Remove from heat.

In a bowl of warm water add one sheet of rice paper.  Wait about 30 seconds until the rice paper is workable.  Place rice paper on a cutting board and evenly stretched out.  Place 1/2 cup shredded lettuce, 1 tablespoon cilantro, and 1 tablespoon shredded carrots. Roll up the spring roll like a burrito folding over the top, closing in both sides, and then rolling completely over (that made total sense in my head, but I'm not sure how well it translated over...just roll the spring roll up so the goodness in the middle does not fall out).


Now for the peanut sauce...

2 tablespoons Creamy Peanut Butter
1/2 teaspoon diced fresh Ginger Root (can substitute ground Ginger if you have it on hand)
1 1/2 tablespoons Rice Vinegar
2 teaspoons Sugar
1 heaping tablespoons Hoisin Sauce
1 1/2 teaspoons Soy Sauce
1/2 teaspoons Sesame Seed Oil
1 pinches Red Pepper Flakes
1 1/2 tablespoons Water
2 tablespoons chopped peanuts

Add all ingredients up to the chopped peanuts together.  The sauce will thicken as it stands.  Sprinkle the peanuts on the top.  Dip your spring rolls into the sauce and partake of the goodness!!!

Italian Crockpot Chicken

This is a super easy and super delicious meal!  I love cooking it on a Sunday and I put it all together as soon as I get home from church, take a nap, lounge around, and viola...dinner is ready to be devoured!!! I like it with chicken thighs; bone and skin included.  I think the dark meat gives this dish a depth of flavor that white meat just can't give you.  Dark meat is also much cheaper...so this meal is way more bang for your buck! 

4 Chicken thighs
16 Ounce Bottle of Italian Dressing
1/2 Cup of Parmesan Cheese
4-6 Red potatoes scrubbed and cut in quarters
1/2 bag of mini carrots

Layer the ingredients as follows: potatoes, carrots, chicken.  Pour Italian dressing and Parmesan cheese over the top of the chicken.  Cook on low for 4-6 hours.

When the chicken is cooked and the veggies are soft, carefully take them out and place on a baking sheet.  Place under the broiler to give everything a nice char look and flavor.  This step is what takes this meal from good to great.  I have never been a fan of mushy potatoes and carrots with floppy chicken skin :(  Gross right...that is why the broiler is a must for this meal!!  Once everything has a beautiful golden brown glow...it's din-din time!!!!


Chicken Stuffed Chili Peppers


We recently had a sweet little old lady bring us 4 poblano peppers from her garden and this is what I came up with to use them for.  She also brought over an extremely spicy habanero pepper that we added into the mix, but it is definitely not necessary :)  Only if you like things real spicy!

These peppers are really tasty!  A meaty rendition of a chili rellanos.  The combination of spicy chicken with mildly sweet and spicy pepper is amazing.  This recipe is definitely a keeper!!

4 poblano peppers
1 tablespoon olive oil
2 cups cooked shredded chicken
1 packet taco seasoning (I like McCormick brand)
1 bunch cilantro (chopped and divided in 1/2)
1/2 chopped red onion
Queso Fresco

To start off with roast your peppers either under the broiler or on top of your gas burner.  When all the skin is evenly charred put them into a glass bowl and cover with saran wrap.  Let them sit for a few minutes so the skin is easier to peel off.

While the peppers are sitting in their sauna, heat the olive oil in a skillet.  When the olive oil is heated add the chopped onion and cook until the onions are translucent.  Add the chicken and the taco seasoning.  When the chicken is thoroughly coated, add the cilantro and cook just until the cilantro is wilted.  Take the mixture off the heat.

Peel the skin off the peppers and slit down the center of the pepper.  Remove the stem and the seeds and lay flat open.  Add 1/4 of the meat mixture to each pepper and close using a toothpick to hold secure.  Sprinkle some crumbled queso fresco over the top of each pepper and put under the broiler until the cheese is toasted.

Serve with fresh cilantro over the top.  You can also put sour cream, guacamole, or even salsa on the top!  ENJOY!!

Tuesday, August 21, 2012

Baked Garlic Parmesan Chicken

I love that this mean uses Parm cheese instead of breading.  It was crispy, full of flavor, and a cinch to make.  Low carbs, but tasted like it was covered in breading.  I LOVED it!!

1/2 cup grated Parmesan cheese
1 package Good Seasons Italian Dressing mix
1/2 teaspoon garlic powder
6 boneless skinless chicken breast halves


Preheat oven to 400 degrees F. Mix cheese, dressing mix and garlic powder.  Dip chicken into egg; coat with cheese mixture. Place in shallow baking dish. Bake 20-25 min at 400 degrees and then put chicken under the broiler for a few minutes to brown.

Finger Lickin Ribs

These are fall-off-the-bone amazing!  You don't need an expensive smoker to create the most amazing restaurant quality ribs!  Just an oven and perhaps a grill!

3-5 lbs pork baby back ribs
1 bottle BBQ sauce (my fam likes Sweet Baby Ray's)
1 L Dr. Pepper (any carbonated soda will do, but I think the Dr is the best!)
1 cup Montreal Steak Seasoning

Preheat oven to 350 degrees.  In a jelly roll pan pour the Dr. Pepper into the bottom and place ribs meat side up on top.  Rub Steak Seasoning generously into the ribs.  Cover with aluminum foil and bake for 2 1/2 hours. 

To finish ribs off place on a heated grill and baste with BBQ sauce.  Cook for about 15 minutes or until grill/char marks appear on the ribs.  I promise these ribs will not let down.  We have made them several times and they are simply incredible!!!

Chicken Parmesean Alfredo

This is a break from the normal chicken parm I usually make.  This alfredo sauce makes this dish rather rough on the hips, but one and a while is just A-ok!  It's really light and refreshing and pretty quick to make.  This would be a great meal to take to a new mother/sick or otherwise afflicted person ;)


4 boneless, skinless chicken breast halves
1 egg, beaten
3/4 cup seasoned dry bread crumbs
1/4 teaspoon paprika
1 (16 ounce) Classic Alfredo Sauce
1/2 cup shredded mozzarella cheese
1 medium tomato, chopped
Preheat oven to 400 degrees F. Dip chicken in the egg, then bread crumbs combined with paprika, coating well.
Arrange chicken in 13 x 9-inch baking dish. Bake uncovered 20 minutes.               
Pour 1 cup Classic Alfredo Sauce over chicken; top with cheese, then tomato. Bake an additional 10 minutes or until chicken is thoroughly cooked. Serve with remaining Sauce, heated, and sprinkle, if desired, with grated Parmesan cheese.

Sticky Chicken Fingers

These are so delicious and easy to make with all the "chicken nugget-esq" food you have on hand with kids!  They are a bit messy and slightly spicy, so be careful with sensitive kids!


1 pkg. frozen breaded chicken strips (We use Tyson brand)
6 Tbl. Frank's Hot Sauce (It has to be Franks Hot Sauce, no other sauce will taste as good)
4 Tbl. water
1 1/2 c. brown sugar

Chicken:
Prepare the chicken strips as directed on the back of the package.

Sauce:
Heat hot sauce, water and brown sugar in a saucepan over medium heat, until sugar is dissolved.

Pour sauce over chicken, and enjoy! Serve with ranch dressing for dipping.

Honey Mustard and Bacon topped Chicken

This recipe is similar to Outback Steakhouse's Alice Springs Chicken.  It is a family favorite and includes all the major food groups; protein, dairy, veggies, and bacon.

1/2 cup Dijon Mustard
1/2 cup Honey
1/2 whole (juice Of) Lemon
1/2 teaspoon Paprika
1/2 teaspoon Salt
Crushed Red Pepper (optional To Taste)
6 whole Boneless, Skinless Chicken Breasts
1 pound Thick Cut Bacon
1 cup sliced button mushrooms
Bacon Grease
Sharp Cheddar Cheese, to taste
Canola Oil


To begin, make the marinade. In a large bowl mix together ½ cup Dijon or country/grainy mustard with ½ cup honey, juice of ½ lemon, ½ teaspoon paprika, and ½ teaspoon salt and whisk until smooth. Sprinkle in some crushed red pepper flakes or cayenne if you like things a little spicy. Set aside.

Next, rinse the chicken breasts, place between two sheets of waxed paper and pound to around ½ to ¾ inch thick with a mallet. Next, add the chicken to the bowl with the marinade, cover with plastic wrap and place in the refrigerator for 1 to 3 hours.

While the chicken marinates, fry up some bacon. When finished cooking, reserve ¼ cup of the bacon grease and clean out the skillet.

When the chicken is done marinating, preheat the oven to 400 degrees. Remove the chicken from the fridge and pour off excess marinade. Heat half of the reserved bacon grease with an equal quantity of Canola Oil in the clean skillet over medium-high heat. When the grease is nice and hot add two or three pieces of chicken to it. Cook until brownish/blackish, about 1 to 1 ½ minutes per side. Remove chicken to a large baking sheet. If cooking many pieces of chicken, repeat skillet process and remove finished chicken to baking sheet. Place chicken in a 9x13 pan and top with mushrooms, place into a preheated oven and cook for about 10 minutes. Remove from oven.

Lay a few pieces of bacon over each chicken breast. Sprinkle shredded sharp cheddar cheese over the top of the chicken as generously as you like. Return pan to oven for an additional five minutes until cheese is melted and bacon is sizzling. Serve immediately.

Butterfinger Bomb Cake

This is modeled after the "Better than..." cakes out there, but I absolutely love the use of butterfinger in this recipe!  It's easy peasy to make and super yummy!
1 Chocolate Cake Mix *(I like to use Betty Crocker)
1 C. Sour Cream
1 Jar Caramel Ice Cream Topping
4 regular size Butterfinger Candy Bars
1 (8 oz.) Cool Whip Topping
Mix & bake cake to directions on box, plus adding in the sour cream. Bake in a 9×13″ pan While still warm, poke holes all over cake using the end of a wooden spoon. Pour caramel topping over the warm cake and “into” the holes (reserve 5 TBSP). Then set in fridge to chill for at least 30 minutes. Spread Cool Whip over cake. Next crush Butterfingers and sprinkle on Cool Whip. Finish by drizzling remaining caramel over cake.
Store cake in refrigerator.


Au Gratin Potatoes

These are so simple and don't use any cream of... soups!  Dominik LOVES them and they make the perfect side dish to any protien "centered" meal!

4 whole Russet Potatoes, Scrubbed Clean
2 Tablespoons Butter, Softened
1-1/2 cup Heavy Cream
1/2 cup Whole Milk
2 Tablespoons Flour
4 cloves Garlic, Finely Minced
1 teaspoon Salt
Freshly Ground Pepper, to taste
1 cup Sharp Cheddar Cheese, Freshly Grated


Preheat oven to 400 degrees.  Smear softened butter all over the bottom of a baking dish.

Slice potatoes, then cut slices into fourths.

In a separate bowl, whisk together cream, milk, flour, minced garlic, salt, and plenty of freshly ground black pepper.

Place 1/3 of the potatoes in the bottom of the baking dish. Pour 1/3 of the cream mixture over the potatoes.

Repeat this two more times, ending with the cream mixture. Cover with foil and bake for 30 minutes. Remove foil and bake for 20 minutes, or until potatoes are golden brown and really bubbling. Add grated cheese to the top of the potatoes and bake for 3 to 5 more minutes, until cheese is melted and bubbly.

Allow to stand for a few minutes before serving by the spoonful. Delicious!

French Bread

I have made this twice and it turned out great both times!  It's super easy, and way cheaper and more delicious than store bought!  It turned out great with Au Ju sandwiches and garlic bread!

2 ¼ c. warm water
2 T. sugar
1 Tbsp yeast
1 Tbsp salt
2 Tbsp oil
5 ½ -6 cups flour-stirred before measured


Dissolve sugar and yeast in the warm water. Let this proof—or sit for a few minutes until it bubbles. Then add salt, oil and 3 cups of flour and beat well. Add in 2 1/2 -3 more cups of flour. The dough should clean off the sides of the bowl and not be too stick – but be careful not to add too much flour. Knead for a few minutes.

Leave the dough in the mixer to rest for 10 minutes and then stir it down (turn on your mixer for 10 seconds) and then allow to rest another 10 minutes. Repeat for a total of 5 times. Then turn dough onto a floured surface and divide into two equal parts. Roll each part into a 9×13 rectangle. Roll dough up, starting from long edge of loaf to seal. Arrange seam side down on large baking sheet that’s been sprinkled with corn meal, allowing room for both loaves. Repeat with second part of dough.

With a sharp knife, cut 3 gashes at an angle on the top of each. Cover lightly; allow to rise 30 minutes. Brush entire surface with egg wash (one egg beaten slightly with 1 Tbsp of water). If desired, sprinkle with sesame seeds. Bake for 30 minutes at 375 degrees.

Snickers Brownies

This is TJ's alltime favorite dessert.  It is quite labor intensive, but worth it when you get a ton of compliments ;)


Brownie Layer
1 box of brownie mix, I love Costco's Ghiradelli Brand!
Ingredients called for on box
1/4 cup hot fudge topping, unheated, straight from the jar

Nougat Layer
1/4 cup unsalted butter
1 cup granulated sugar
1/4 cup evaporated milk
2 (7 oz.) jars marshmallow creme (@1 1/2 cups)
1/4 cup peanut butter
1 1/2 cups salted peanuts, roughly chopped
1 teaspoon vanilla

Caramel Layer
1 (17 oz.) jar of caramel

Candy Bar Topping
1 1/4 cups chocolate chips
1/4 cup peanut butter.

Prepare brownie batter according to package directions for a 9x13-inch pan, adding 1/4 cup hot fudge ice cream topping, unheated and straight from the jar to the batter. Make sure to follow the high altitude directions if you live at high altitude. Cool completely.

Melt butter in a saucepan over medium heat. Add sugar and milk, stirring until dissolved. Bring to a boil. Add in the marshmallow creme (I didn't measure, because how exactly do you measure that sticky fluff? I used one complete 7 oz. jar and most of the second jar), peanut butter, and vanilla stirring until smooth. Turn off heat and fold in peanuts. Pour evenly over cooled brownies. Use a spatula to help spread the mixture. Cool. I stick the brownies in the freezer for about 15 minutes.

Scoop caramel topping into a heavy bottomed saucepan and heat over low until caramel is soft and easy to stir. Pour the caramel over the nougat layer. Make sure to pour it evenly across the nougat covering as much as the surface as you can. This makes it easier to spread the caramel with a spatula. Let cool. Again, I usually stick this in the freezer for about 15 minutes. Scoop caramel topping into a heavy bottomed saucepan and heat over low until caramel is soft and east to stir rather than mess with hot.
Melt chocolate chips and peanut butter together in a saucepan over low heat, stirring occasionally, until smooth. Pour over nougat layer and cool completely. I usually stick them in the fridge until the chocolate is set. They chocolate gets pretty soft when left out, so I like to store these in the fridge and let them set out for a few minutes before cutting them. You want the chocolate to be cool enough to be set, but warmed up just a bit so that they are soft enough to cut more easily. Enjoy!

Peanut Butter Chocolate Dessert

This dessert is amazing.  It's so light, but ultra fattening; the mark of a perfect recipe!  It's pretty simple to make and you don't have to turn on your oven.  A great summertime dessert!

20 chocolate cream-filled chocolate sandwich cookies, divided
2 tablespoons butter, softened
1 package (8 ounces) cream cheese, softened
1/2 cup peanut butter
1-1/2 cups confectioners' sugar, divided
1 carton (16 ounces) frozen whipped topping, thawed, divided
15 miniature peanut butter cups, chopped
1 cup cold milk
1 package (3.9 ounces) instant chocolate fudge pudding mix


Crush 16 cookies; toss with the butter. Press into an ungreased 9-in. square dish; set aside.

In a large bowl, beat the cream cheese, peanut butter and 1 cup confectioners' sugar until smooth. Fold in half of the whipped topping. Spread over crust. Sprinkle with peanut butter cups.

In another large bowl, beat the milk, pudding mix and remaining confectioners' sugar on low speed for 2 minutes Let stand for 2 minutes or until soft-set. Fold in remaining whipped topping.

Spread over peanut butter cups. Crush remaining cookies; sprinkle over the top. Cover and chill for at least 3 hours.

Roasted Rosemary Garlic Chicken

This was super simple and delish!  It is used with bone in thighs and I'm pretty sure this is a must; although TJ and I really like the dark meat.  I'm sure you could use white meat, but you would definitely have to adjust cooking time.

8 chicken thighs
10 peeled garlic cloves
1 large white onion, slice
2 tablespoons fresh rosemary, chopped
Extra Virgin Olive Oil
Sea Salt and black pepper


Drizzle extra virgin olive oil generously over the chicken (both sides). Arrange chicken thighs skin side up on a large baking sheet. Season well with sea salt and black pepper. Scatter garlic, rosemary and onion over the top.

Chicken Alfredo Roll-ups

So this is one of those comfort meals that will put a little meat on your bones (by that I mean cellulite on your hips), but it is totally worth it!!!  It is relatively easy and would be good as a freezer meal too!


9 lasagna noodles
2 ½ cups alfredo sauce
2 cups cooked, shredded chicken
1 16oz bag spinach, chopped (could substitute broccoli, or any green veggie of choice)
oregano
garlic salt
3 cups shredded Mozzarella, or cheese of your choice

Spray an 8x8 pan with non-stick spray and pour ½ cup alfredo sauce, or just enough to cover the bottom of the pan. Boil 8-10 cups water in a large pan, cook lasagna noodles until al dente. (I usually cook 1 or 2 extra just because lasagna noodles always seem to break on me when I am stirring them.)
Now this is the important part! Drain and rinse the noodles with cold water to prevent them from sticking to each other. Then, lay out each noodle individually and blot dry with a paper towel.

Spread about 2 Tbs. alfredo sauce over each noodle. (if there is too much sauce you will have a big mess on your hands!) Sprinkle oregano and garlic salt on top of sauce. Take 1/9 of the shredded chicken and spread it out evenly over each noodle. Add approx. 3 Tbs. cheese. To roll up, start at one end and roll the noodle over the toppings. You will need to lift the noodle a little to prevent squishing out the inside ingredients while rolling.

Place the roll-ups in the pan, one by one, seam-side down so they don't come undone. Once they are all in the pan, pour the remaining alfredo sauce over the top. Top with remaining cheese. Bake at 350 degrees for about 30 minutes, or until the cheese is completely melted on top.

Balsamic Grilled Bruschetta Chicken

4 boneless skinless chicken breasts, thawed
Pinch of salt
¼ Cup balsamic vinegar
¼ Cup extra virgin olive oil
8 slices fresh mozzarella cheese
4 Roma Tomatoes, seeded and diced
8 fresh basil leaves, stacked, rolled and thinly sliced
3 cloves fresh garlic, minced
Pinch of salt
1 Tablespoon balsamic vinegar

Preheat a grill pan over medium heat on the stovetop.Spray with cooking spray.Combine balsamic and olive oil in a bowl.Season both sides of chicken with pinches of salt and place on grill.Brush top sides of chicken with balsamic mixture.Cook for 4-5 minutes and flip chicken.Brush with additional balsamic and cook for an additional 4-5 minutes or until cooked through.During the last 2 minutes of grilling place 2 slices of cheese over top each chicken to melt.
In a large bowl combine the tomatoes, basil garlic, salt and balsamic.Toss gently to combine.Place chicken breasts on a serving plate and top with tomato mixture.Serve warm.


**When I make this I usually have leftovers...bruschetta grilled cheese sandwiches are AMAZING!!!

Cilantro Thai Grilled Chicken

This is so simple and full of flavor.  It's perfect for those quick, simple meals when you don't have too many things on hand either!  Love it!


2 garlic cloves, coarsely chopped
1/2 cup cilantro
2 tbst asian fish sauce
1 tablespoon sesame oil

Place all the ingredients above in a food processor (magic bullet works great too!) and process until smooth.

4 boneless skinless chicken breasts

Pour marinade over chicken breast and let flavors sink in for 15 minutes in the refrigerator.
Prepare your grill or broiler. Cook until temperature registers 165F on the meat thermometer. Let the chicken breasts rest for 5 minutes before serving, this prevents the meat from drying up.

Philly Cheesesteak Stuffed Peppers

So lately I have been trying to reduce the carbs and increase the protein.  I came across this recipe on pinterest and decided to try it out.  It was actually really good! TJ took it to work for leftovers the next day and all his coworkers were jealous ;) That's the mark of a good meal right!

8 oz. Thinly Sliced Roast Beef
8 Slices Provolone Cheese
2 Large Green Bell Peppers
1 Medium Sweet Onion
6 oz. Baby Bella Mushrooms
2 Tbs. Butter
2 Tbs. Olive Oil
1 Tbs. Garlic - Minced
2 tbs. Worchestershire Sauce
Salt and Pepper - to taste

Slice peppers in half lengthwise, remove ribs and seeds.
Slice onions and mushrooms. Saute over medium heat with butter, olive oil, minced garlic, Worcestershire sauce and a little salt and pepper. Saute until onions and mushroom are nice and caramelized. About 25-30 minutes.
Preheat oven to 400*
Slice roast beef into thin strips and add to the onion/mushroom mixture. Allow to cook 5-10 minutes
Line the inside of each pepper with a slice of provolone cheese.
Fill each pepper with meat mixture until they are nearly overflowing.
Top each pepper with another slice of provolone cheese.
Bake for 15-20 minutes until the cheese on top is golden brown.
Serve and Enjoy!!
Makes 4 servings

Oven Roasted Potatoes

These potatoes are somewhat labor intensive, but oh so worth it!  The flavors are great and I love the mixture of three different types of potatoes!  It's a great way to mix up the monotony of the standard mashed potatoes!

1 Tbsp olive oil
1/2 lb hickory smoked, thick sliced bacon
3 1/2 lbs Gourmet Medley Potatoes (I get mine from Costco! They are baby youkon, reds, and purple potatoes)
2 cloves garlic, minced
1/4 cup Parmigiano-Reggiano, freshly grated
coarse salt
fresh ground pepper
fresh parsley


Put potatoes in a large pot. Fill pot with water until potatoes are covered by 2-3 inches of water. Bring water to a boil and cook for 12-15 minutes or until potatoes are fork tender.  Alternately you can place into a gallon sized ziploc bag with a 2 tbsp water.  Poke a few holes and microwave for 8-10 minutes.

Meanwhile, partially freeze bacon for easier cutting. (Ten minutes in the freezer works well.) Slice bacon strips in half, then cut into 1/2-inch pieces. I like to cut my bacon prior to cooking. It’s easier to work with in the skillet and easy to drain with slotted spoon.

Cook bacon in a skillet until golden, but still flexible. You don’t want it crunchy. Remove cooked bacon onto a plate lined with paper towels. Reserve the bacon drippings.

Check potatoes and if fork tender, drain and allow to cool. 

While potatoes are cooling, preheat the oven to 425° and mince the garlic and parsley. Also, grate the Parmigiano-Reggiano.

Next, prepare the baking sheet by brushing 1 tablespoon of olive oil and half the bacon drippings on the bottom of the pan. I used a fairly large cookie sheet for this and it worked well.

Once potatoes are cooled, either quarter them, or slice in half depending on preference.  I like to quarter so there is more seasoning per surface area of potato. 

Place cut side down on prepared pan and sprinkle with course salt and fresh ground pepper. Place in 425° oven for 35-40 minutes. Rotate potatoes halfway through the baking time to ensure an even color. I did not do this and some of mine were more golden than others.

Reduce temperature to 375°, turn potatoes over and sprinkle with the bacon, garlic, and Parmigiano-Reggiano.

Add more salt and pepper if desired. Return to oven for an additional 15-20 minutes or until potatoes are evenly browned and cheese is melted. Remove from oven and sprinkle with fresh parsley. Makes 4-6 servings, depending on serving size. Serve immediately!

Zesty Shrimp

These are so stinkin delish and incredibly easy to make!  It does have quite a bit of butter though, so it's not too friendly on the hips; seems like the best meals never are though right!
1/2 c Melted butter
1 lemon sliced
1 - 1/2 pound raw shrimp (deveined and peeled)
1 packet Italian dressing seasoning packet


Line a 9x13 pan with foil and pour melted butter into the bottom.  Top with sliced lemon. Put down fresh shrimp, then sprinkle one pack of dried Italian seasoning. Put in the oven and bake at 350 for 15 min.

Wednesday, February 1, 2012

Olive Garden Breadsticks


You will have to excuse my picture...I was so engrossed with the complete and utter deliciousness of these breadsticks that I forgot I needed to snap a photo.  Hence the very small sized breadstick :)  These were so stinkin good it should be illegal.  They taste just like the ones at Olive Garden, but better because you get to eat them in your own home!  You must make these!!!


Dough:
1 1/2 cups warm water
2 Tbs sugar
1 Tbs yeast
1 Tbs salt (yes, the recipe calls for 1 Tablespoon, which I use every time and they turn out great.)
2 Tbs butter, softened
4-5 Cups flour

Topping:
3 Tbs butter melted
sea salt
1/4 tsp garlic powder

For the dough, pour the water into a stand mixer with the sugar and yeast, let that sit and froth for about 10 minutes. Add salt, butter, and 2 cups of flour. Mix the dough on low. Add the rest of the flour a half cup at a time, until dough scrapes the sides of the bowl clean. Mix the dough about 5 minutes on medium speed, until its soft and easy to work with.

Roll the dough out into a long log, spray a knife with cooking spray and cut the dough into 12-14 pieces. Roll those pieces into about 6 inch long snakes. Spray 2 large cookie sheets with cooking spray, and lay the breadsticks out leaving about 2 inches between each one. Place them in the oven with the temperature turned to 170 degrees. Let them rise for about 15 minutes, or until doubled in size.( I have also let them sit at room temp until they are doubled in size and then bake them in the oven)

Once risen, brush them with the 1 1/2 T of melted butter and sprinkle them with salt. Now preheat the oven to 400 degrees and bake them for 12-15 minutes or until golden brown.

While they are baking combine the rest of the melted butter with 1/4 t garlic powder. When the breadsticks are golden brown, remove them from the oven and brush them with the butter/garlic mixture.

Tuesday, January 17, 2012

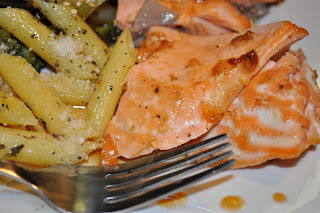
Maple Glazed Salmon

This salmon is easy-peasy to make, and super delicious.  It is sweet and salty, and as long as you don't over bake it, it's practically fool-proof.  This is a must have when salmon is on sale!!!


1/4 cup real maple syrup
 2 tablespoons soy sauce
1 clove garlic, minced
1/4 teaspoon garlic salt
1/8 teaspoon ground black pepper
1 pound salmon

Preheat oven to 400 F.
In a small bowl, mix the maple syrup, soy sauce, garlic, garlic salt, and pepper. Place salmon in a shallow glass baking dish, and coat with the maple syrup mixture. Cover the dish, and marinate salmon in the refrigerator 30 minutes, turning once.
Bake salmon uncovered 20 minutes, or until easily flaked with a fork.